


Camera buoy for Water Shots
Filming with a Floating Camera
This low-budget solution for building a floating camera lets you capture action shots from the water without having to ask one of your surf buddies to get in the water. Are you alone at the spot but still want to get some great action shots? Here’s how it works:
A pool noodle serves as the base for the camera buoy, which we’ve been using successfully quite often since last fall. An action camera, such as a GoPro Hero 10 Black - which can record video in 5.3K and features excellent image stabilization - is mounted on this floating platform. Still images with relatively high resolution (5312x2988 pixels) can later be saved from the video.
You can find a pool noodle in a bright, eye-catching color at Decathlon for 2.99 euros, for example. And the other parts needed to build the buoy cost just a few dollars: cable ties, duct tape (tip: neon colors for visibility on the water), a thin rope, half a plastic bottle, and a rock as a counterweight. The most expensive part is the action cam itself; the mounting bracket’s adjustable joints are usually included in the package
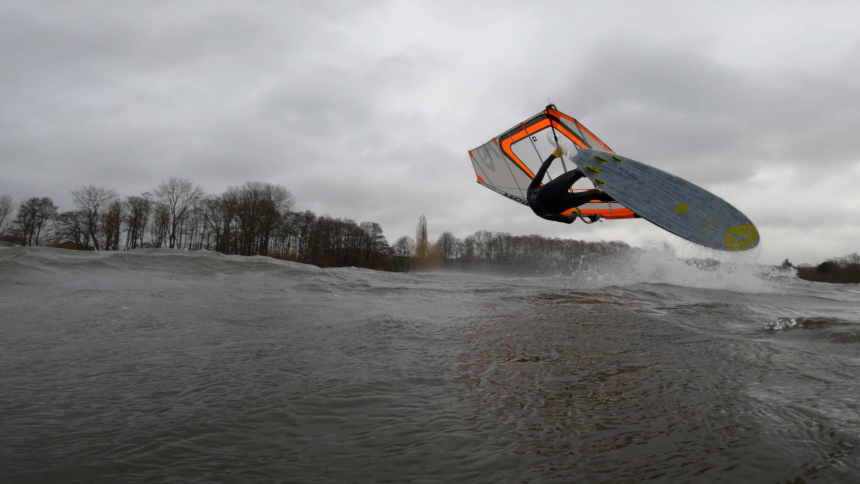
There is no photographer in the water here
Quick Craft Guide
Bend the pool noodle into a horseshoe shape and secure the two ends together with a cable tie. Secure it further with fabric tape, and tape a flat stone directly to the underside to serve as a counterweight for the camera. At the front of the curve, secure a GoPro helmet mount to the top with two cable ties and reinforce it with duct tape. Tie a loop around the noodle and attach it directly to the camera (this secures the action cam in case the plastic mount breaks). Now all that’s missing is the anchor, made from the top and neck of a halved PET bottle, connected to the pool noodle via a 1.5-meter-long line.
User Manual
Wrap the drift anchor line around the float, pull the float over your head, and then paddle out a few strokes. Once outside, unwind the drift anchor, start the camera, and lower it into the water. Thanks to the drift anchor, the camera raft aligns itself relatively well downwind. Now you can keep swimming your laps on the water, always staying downwind of the camera... until the memory card is full, the battery is dead, or the raft has drifted too close to shore.

This is what the low-budget design looks like
In fact, the pink sausage worn around the neck during transport has drawn plenty of curious glances, but after a brief explanation, the concept was always quickly understood.
As I mentioned earlier, I’ve only been using this thing since last fall, so the photos were taken in less-than-ideal weather conditions. With sunshine, blue skies, and calm water, the shots could look amazing.
How practical is filming with the floating camera?
Filming works really well in calm water - ideal for wing foiling, other kinds of foiling, or windsurfing in light winds. You can time your moves well and execute them right in front of the camera.
The choppier the water gets as the wind picks up, the more the camera shakes. A camera with good image stabilization (especially 360-degree cameras) can smooth things out a lot, but even steep, choppy waves at wind force 5–6 cause the buoy to sway violently. It is then difficult to tell as you approach which direction the platform will move in (it rotates up to 45 degrees to the right or left in rough seas).
However, the raft hasn't capsized even on days with 6–7 Beaufort winds on a lake, but using it at a surf spot is obviously out of the question.
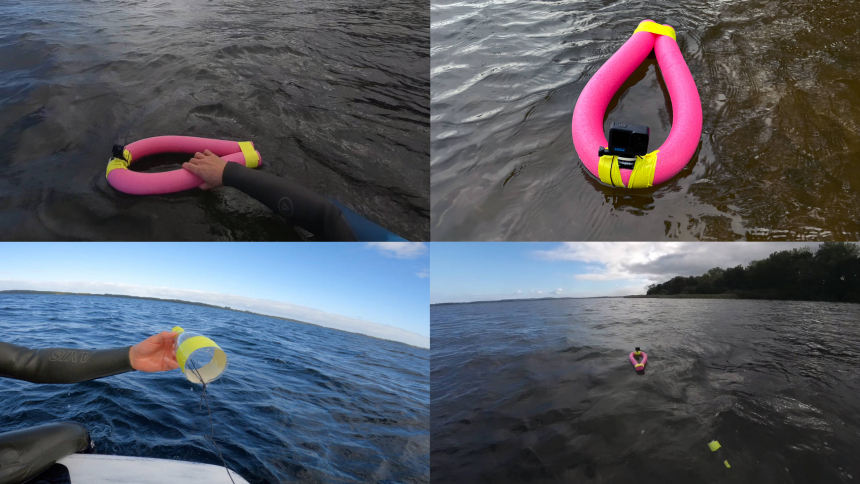
The halved PET bottle serves as a drift anchor
One must not underestimate the risk of loss
It's amazing how easy it is to lose sight of that little buoy from a distance: After passing it, you gain a little height, then you jibe, and before you know it, you're heading straight for the camera again... if you spot it.
The camera continuously drifts downwind. If there is a current in the fishing area, it will also drift in the direction of the current. Bright neon colors make it much easier to spot the camera again. Quick jerks also help you get the camera back in your line of sight quickly.
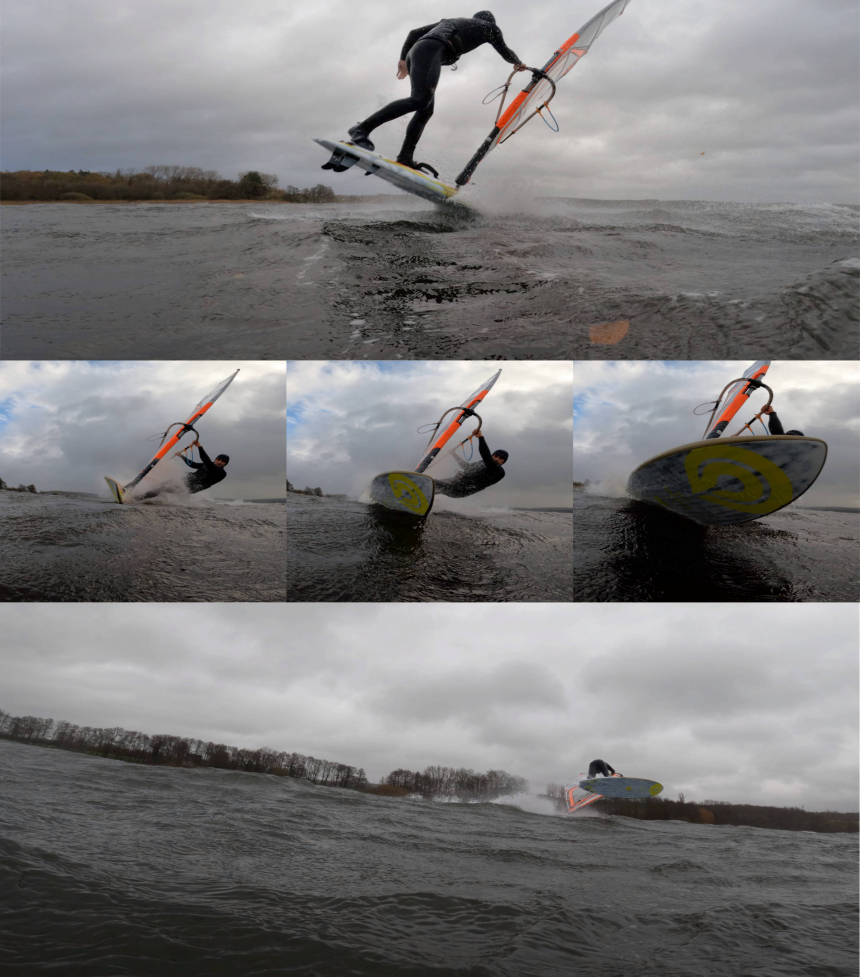
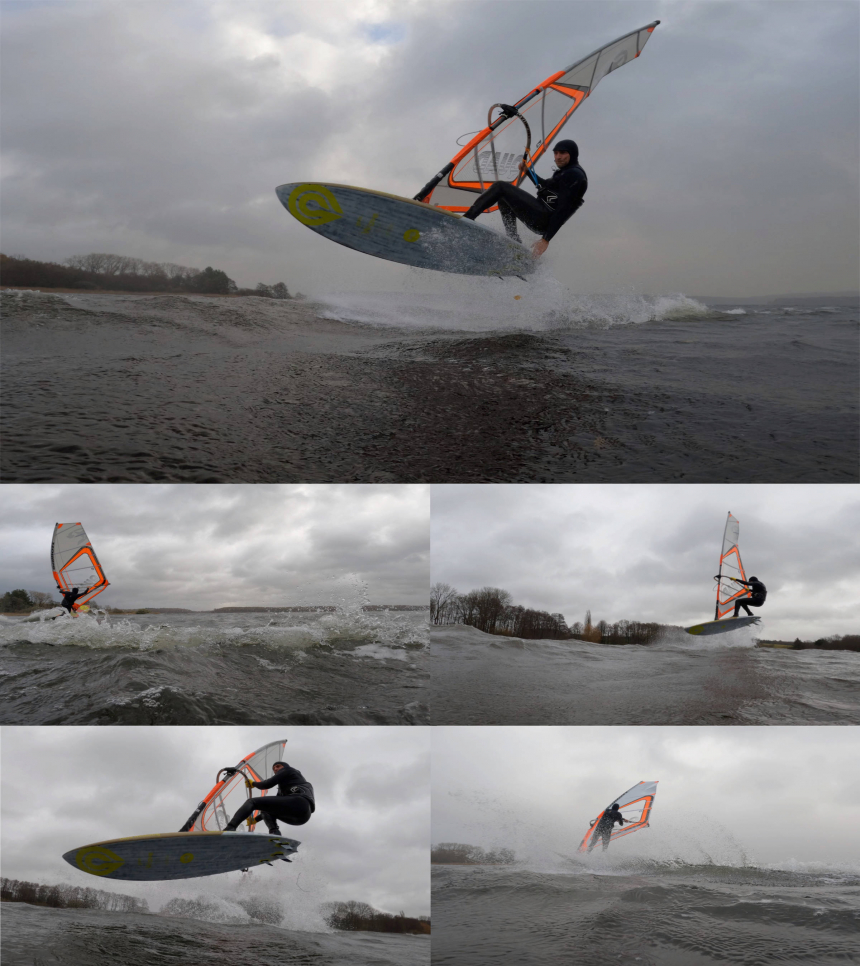
Sample footage from the floating camera - the closer, the better
You should also plan for unpleasant surprises
If your surf gear breaks or the wind suddenly dies down, you could lose your camera, because if you can’t keep up with it, the camera will quickly drift away. With onshore winds, you might be lucky enough to find it again, but in sideshore conditions at the beach or on large bodies of water stretching to the next shore, you should probably expect to lose it (or hope that whoever finds it is honest).
So play it safe: write your contact information on the buoy, or attach an Apple AirTag to it in a waterproof case. The latter makes it easier to find the buoy in a lake, since you can walk along the entire shore or paddle out on a SUP.
That’s our inspiration for building your own. You can upload your photos anytime to our photo gallery and discuss modifications to the floating camera raft there as well.
12.01.2024 © DAILY DOSE | Text: Jürgen Schall | Photos/Videos: Jürgen Schall

Rider: Adrien Bosson Rider: Andre Ludewig Rider: Andre Ludewig Rider: Jose ’Gollito’ Estredo Rider: Lars Petersen Rider: Olaf Barth Rider: Olaf Barth Rider: Olaf Barth Rider: Olaf Barth Rider: Olaf Barth Rider: Olaf Barth Rider: Philip Köster Rider: Robert Büssow Rider: Robert Büssow Rider: Robert Büssow Rider: Sarah-Quita Offringa Rider: Sarah-Quita Offringa Rider: Thomas Traversa Text: Jürgen Schall Photos/Videos: Jürgen Schall DE